
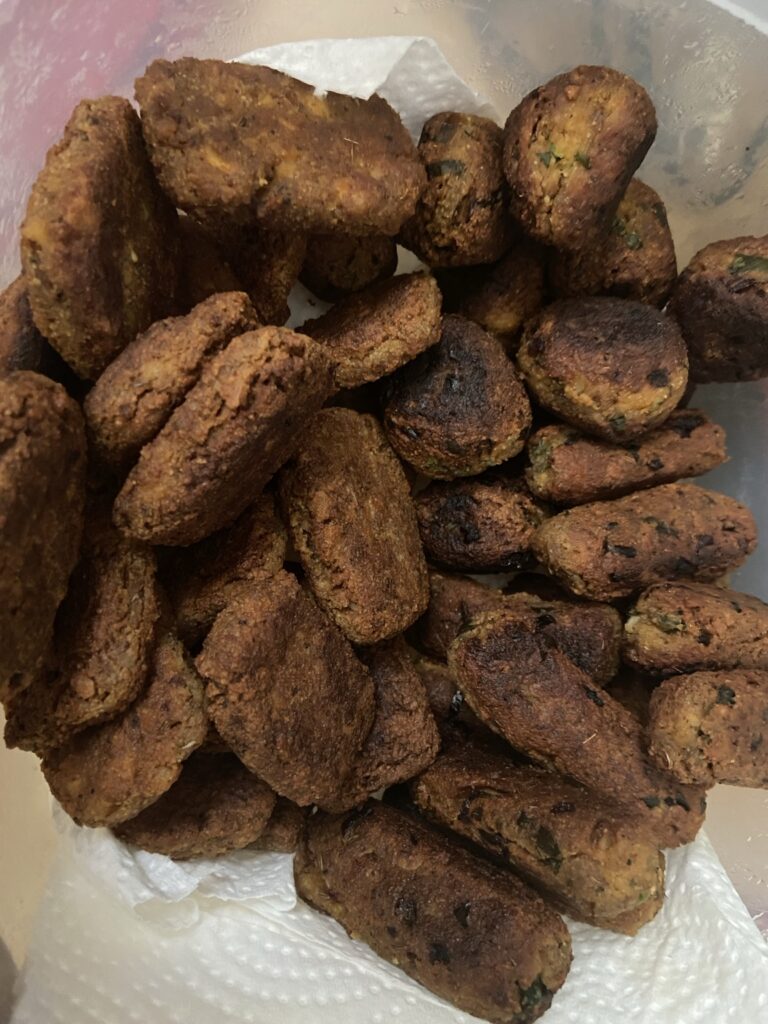
By GreenHouzeEatz
What if one plant-based mixture could turn into patties, kebab-style logs, crispy little bites, savory crumbles, and several different meals?
That’s exactly what happened in my GreenHouze kitchen.
I started with two types of tofu, some bold seasonings, a few fermented flavor boosters, and chickpea flour. I added a little of what I had on hand, worked with the texture, and started shaping.
Before I knew it, I had a mixture that could take on all kinds of personalities.
And that’s how The GreenHouze ShapeShifter came to life.
One plant-based mix. Endless possibilities.
This isn’t one of those recipes where every little thing has to be measured down to the last grain. I’ll give you the foundation, explain what I did, and show you how to make it your own.
Because sometimes cooking is about following instructions.
And sometimes it’s about listening when the ancestors say, “That looks good!” 😂
Why This Recipe Supports the Body
The ShapeShifter is built around tofu and chickpea flour, which provide plant-based protein and important nutrients.
Tofu can also contribute iron and calcium, depending on the type and how it’s made. Chickpea flour adds protein, fiber, and iron.
I especially appreciate recipes like this because they make plant-based nourishment practical. You can prepare one big batch and turn it into several different meals.
Add fresh herbs, vegetables, greens, and your favorite sides, and you’ve got plenty of ways to nourish yourself without cooking an entirely new recipe every day.
For extra iron support, try serving your ShapeShifter with vitamin C-rich vegetables such as bell peppers, tomatoes, or a fresh cabbage salad.
The Secret Is in the Texture
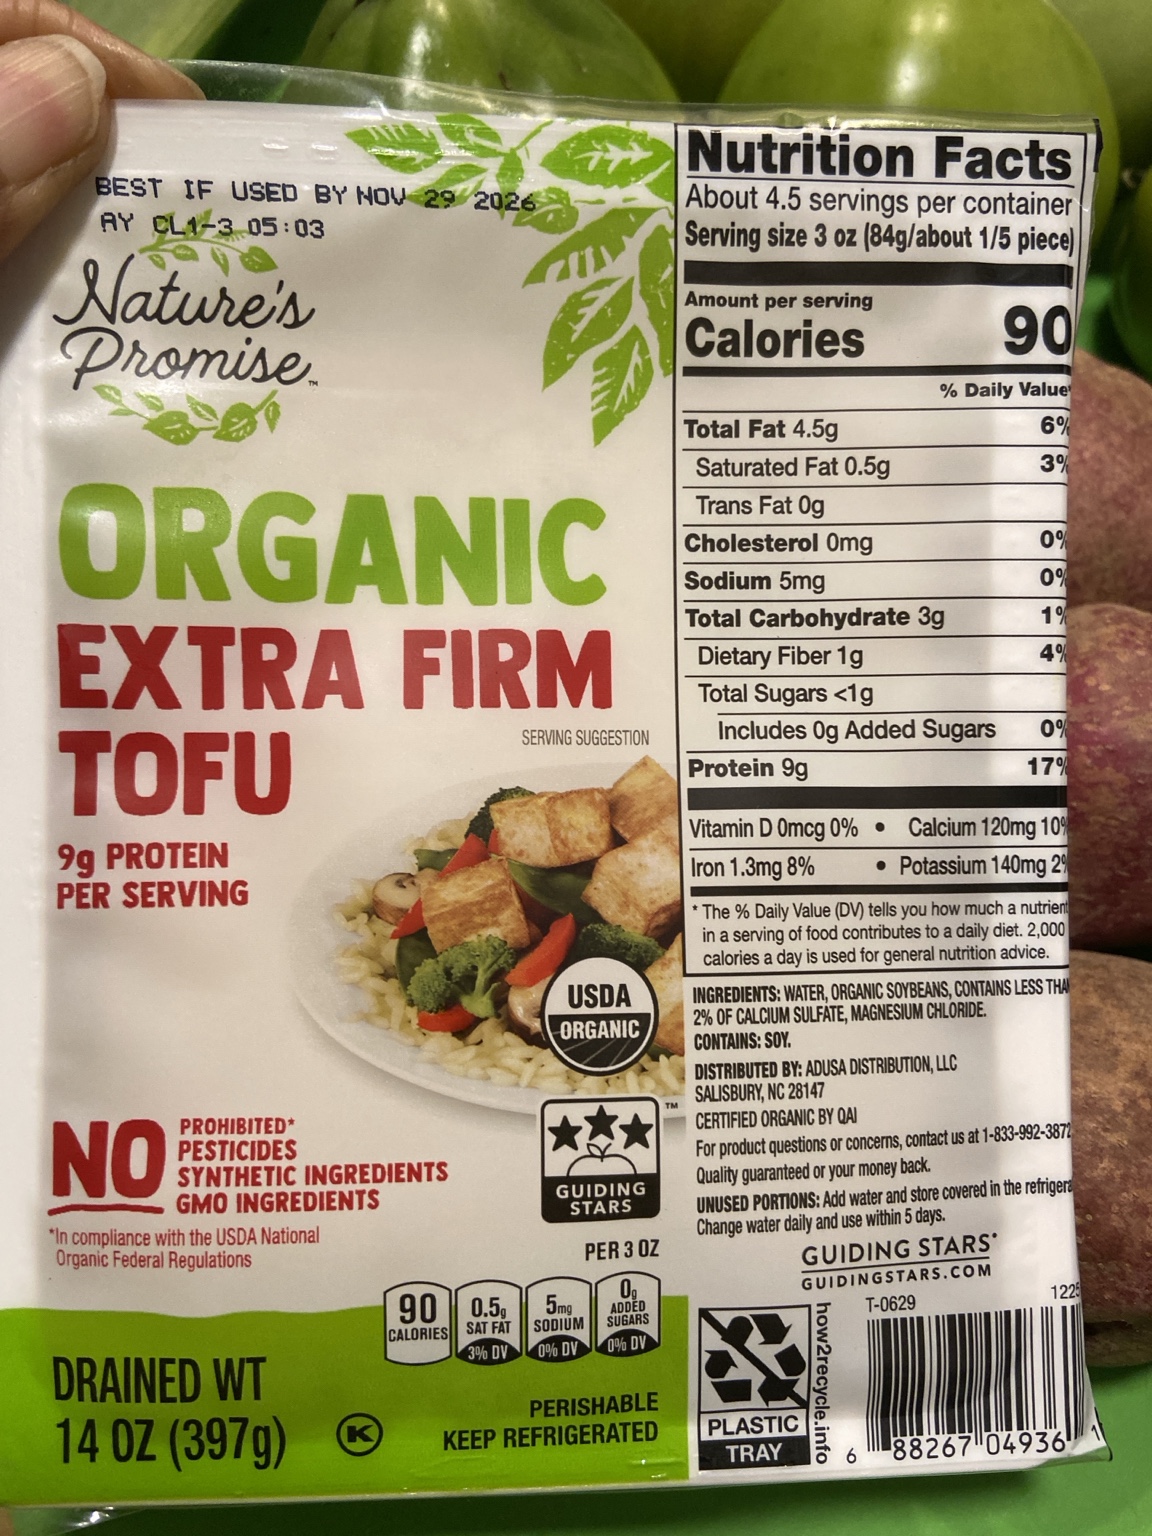
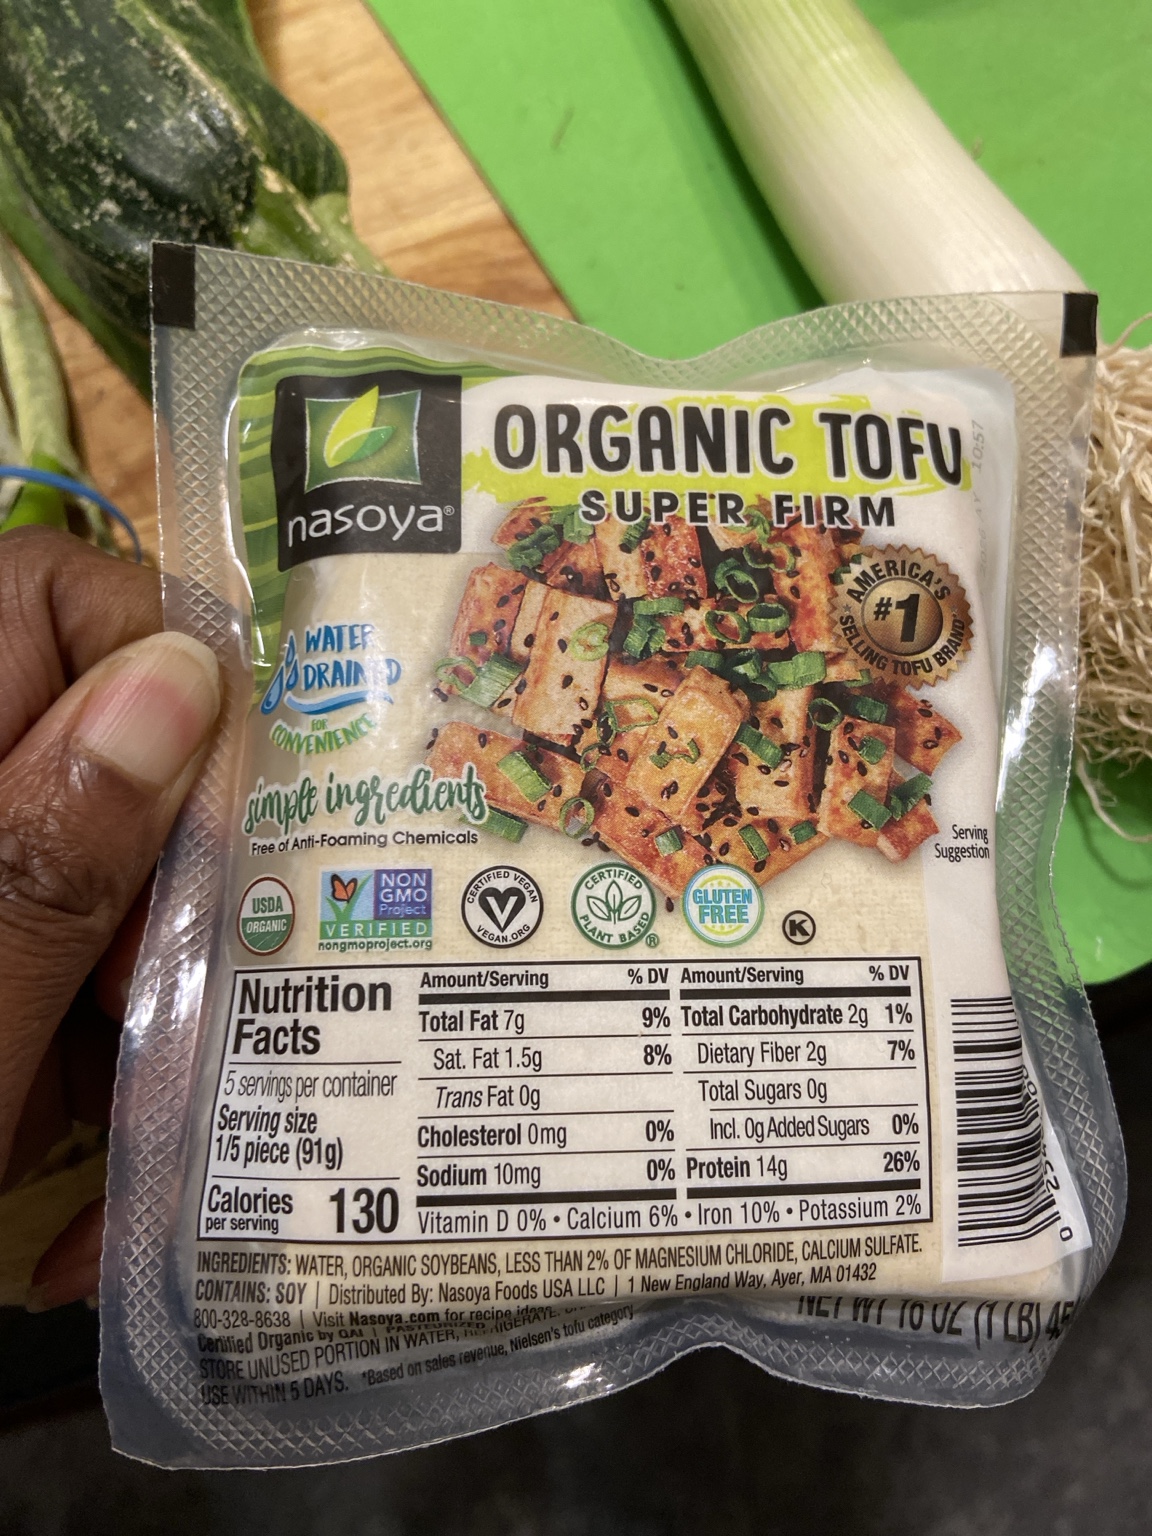
These are the brands I had in my refrigerator for this batch. Any brand will do.
Here’s what makes this mixture different.
I use two kinds of tofu:
- One block of super firm tofu, approximately 16 ounces.
- One block of extra firm tofu, approximately 14 ounces.
You don’t need the exact brands shown in my photographs. Those just happened to be what I had in the refrigerator that day.
I pressed my extra firm tofu first to remove some of the excess moisture. The super firm tofu only needed draining.
Then I divided each block in half.
Half of each tofu block went into the blender with seasonings to create a thick, flavorful base.
The other halves got crumbled into a mixing bowl.
When you combine the two, you get something special: the blended portion helps bring everything together, while the crumbles give the finished mixture some texture and bite.
You don’t want everything completely smooth.
You want a little personality in there!
Building the Flavor
For my original batch, I reached for three fermented flavor boosters:
- Gochujang — the red Korean chili paste.
- Doenjang — the brown Korean fermented soybean paste.
- White miso.
I used roughly a tablespoon of each, give or take.
They bring savory depth, saltiness, and a little complexity to the tofu.
My basic seasoning foundation is smoked paprika, onion powder, garlic powder, salt, and black pepper.
You can also use a bouillon seasoning blend to build flavor.
And if you have fresh garlic, you can put some directly into the blender.
I also used two premade plant-based chorizo sausages in this particular batch. One went into the blender, and the other went into the bowl with the crumbled tofu.
But the sausages are optional.
You can make the ShapeShifter without them.
The same goes for mushrooms. I had mushrooms available that day, so I used them. That doesn’t mean mushrooms are a required ingredient.
The foundation is the two tofus, the seasoning, and enough chickpea flour to bring the mixture together.
The GreenHouze ShapeShifter Recipe

The GreenHouze ShapeShifter
Ingredients
Method
- Press the extra firm tofu to remove excess moisture. Drain the super firm tofu. Divide each block in half.
- Crumble one half of the super firm tofu and one half of the extra firm tofu into a large or medium mixing bowl.
- Place the other half of each tofu block in a blender. Add smoked paprika, onion powder, garlic powder, salt, pepper, and your chosen seasonings. Add approximately 1 tablespoon each of gochujang, doenjang, and white miso if using the original flavor combination. Add fresh garlic or bouillon seasoning if desired. If using plant-based chorizo, add one sausage to the blender. Blend into a thick, well-combined mixture, scraping down the sides as needed.
- Taste the seasoned tofu blend before adding the chickpea flour and adjust as needed. Season a little generously because the chickpea flour can mellow the flavor. If the blended mixture contains an ingredient labeled as requiring cooking, cook a small sample before tasting.
- Pour the blended mixture into the bowl with the crumbled tofu. If using a second sausage, finely chop or crumble it into the bowl. Mix thoroughly.
- Fold in finely chopped green onions, green garlic, or fresh herbs. Add optional sautéed mushrooms, onions, carrots, or other finely chopped vegetables. Cook off excess moisture from vegetables before adding.
- Mix in 1 cup chickpea flour. Add more in approximately ¼-cup increments as needed until the mixture is no longer overly wet, starts pulling away from the bowl, and holds its shape. The final amount varies depending on the moisture in the tofu and optional vegetables.
- Chickpea flour may mellow the seasoning. Cook a teaspoon-sized test portion to check the flavor safely, then add extra spices or bouillon seasoning if needed.
- Separate the mixture into portions and add extra chili powder, finely chopped jalapeño, serrano, fresh herbs, or other seasonings to create different flavor profiles.
- Form into patties, short kebab-style logs, small bites, or leave loose for crumbles.
- Add a little oil to the bottom of a cast-iron or other suitable skillet. Heat over medium to medium-low heat. Add the shapes without overcrowding the skillet. Cook, turning or flipping as needed, until all sides are golden brown or crispy-looking and the centers are fully cooked. Adjust the heat if the outsides are browning too quickly. For crumbles, break the mixture into smaller pieces and cook, stirring and turning until browned and cooked through.
- Enjoy with rice, greens, salads, flatbread, wraps, or your favorite sauces.
Notes
Preparation, Cooking & Yield
Prep: approximately 20–30 minutes, excluding tofu pressing. Cook time varies with shape, thickness, and batch size. Yield: one large batch; portions vary by shape and size.Optional Add-Ins
- Freshness: Green onions, green garlic, cilantro, parsley, dill, chives.
- Savory depth: Sautéed mushrooms, onions, carrots, or extra seasoning.
- Heat: Chili powder, jalapeño, serrano, chili flakes.
- Sausage-free: Omit the plant-based chorizo.
- Low-FODMAP adaptation: Consider scallion greens, leek greens, or chives; adjust onion and garlic seasonings and check packaged ingredients.
- Gluten-free adaptation: Verify the labels of fermented pastes, bouillon, and optional sausages.
Storage Tips
Refrigerate cooked portions in airtight containers for 3–4 days. Freeze cooked portions for 2–3 months for best quality. Reheat thoroughly.Best Time to Use
Meal prep, lunch, dinner, wraps, rice bowls, savory snacks, or any time you want several meals from one versatile plant-based base.GreenHouze Upgrade Tip
Make one batch and divide it into different flavor variations before cooking. Shape some into patties, some into logs, and some into bites. Cook the rest as crumbles for future meals.GreenHouze Kitchen Notes
- Any brand of super firm and extra firm tofu works.
- Press the extra firm tofu before mixing.
- Mushrooms and premade plant-based sausages are optional.
- Green onions and green garlic can be added fresh without precooking.
- Start with 1 cup chickpea flour, then add approximately ¼ cup at a time until the texture is right.
- Chickpea flour can mellow the seasoning, so check the flavor after mixing.
- Shape everything before cooking for easier skillet management, or work in batches if that's how your kitchen flows.
- Cook over medium to medium-low heat so the pieces have time to cook through without browning too quickly.
- No lemon juice is used in this recipe.
Why This Supports the Body
Tofu and chickpea flour provide plant-based protein and contribute iron and other nutrients. Fresh herbs and optional vegetables add flavor and variety. Pair with vitamin C-rich vegetables to support absorption of plant-based iron.Step 1: Press, Drain, and Divide
Start by pressing your extra firm tofu to remove excess moisture.
Drain the super firm tofu.
Divide both blocks in half.
Crumble one half of each block into a large or medium mixing bowl.
Reserve the other halves for blending.
Step 2: Blend the Flavorful Portion
Add the reserved half of the super firm tofu and half of the extra firm tofu to your blender.
Season with smoked paprika, onion powder, garlic powder, salt, and pepper.
For my original batch, I also added roughly a tablespoon each of gochujang, doenjang, and white miso.
If you’re using plant-based chorizo, add one sausage to the blender.
You can also add fresh garlic or your favorite bouillon seasoning.
Blend until everything is well combined and thick, scraping down the sides as needed.
You want a seasoned tofu blend, not a thin sauce.
Now taste your blended mixture and adjust the flavor.
Here’s a little trick: season this blended portion slightly on the generous side.
Why?
Because once you add chickpea flour later, some of that beautiful flavor can mellow out.
Step 3: Combine the Two Textures
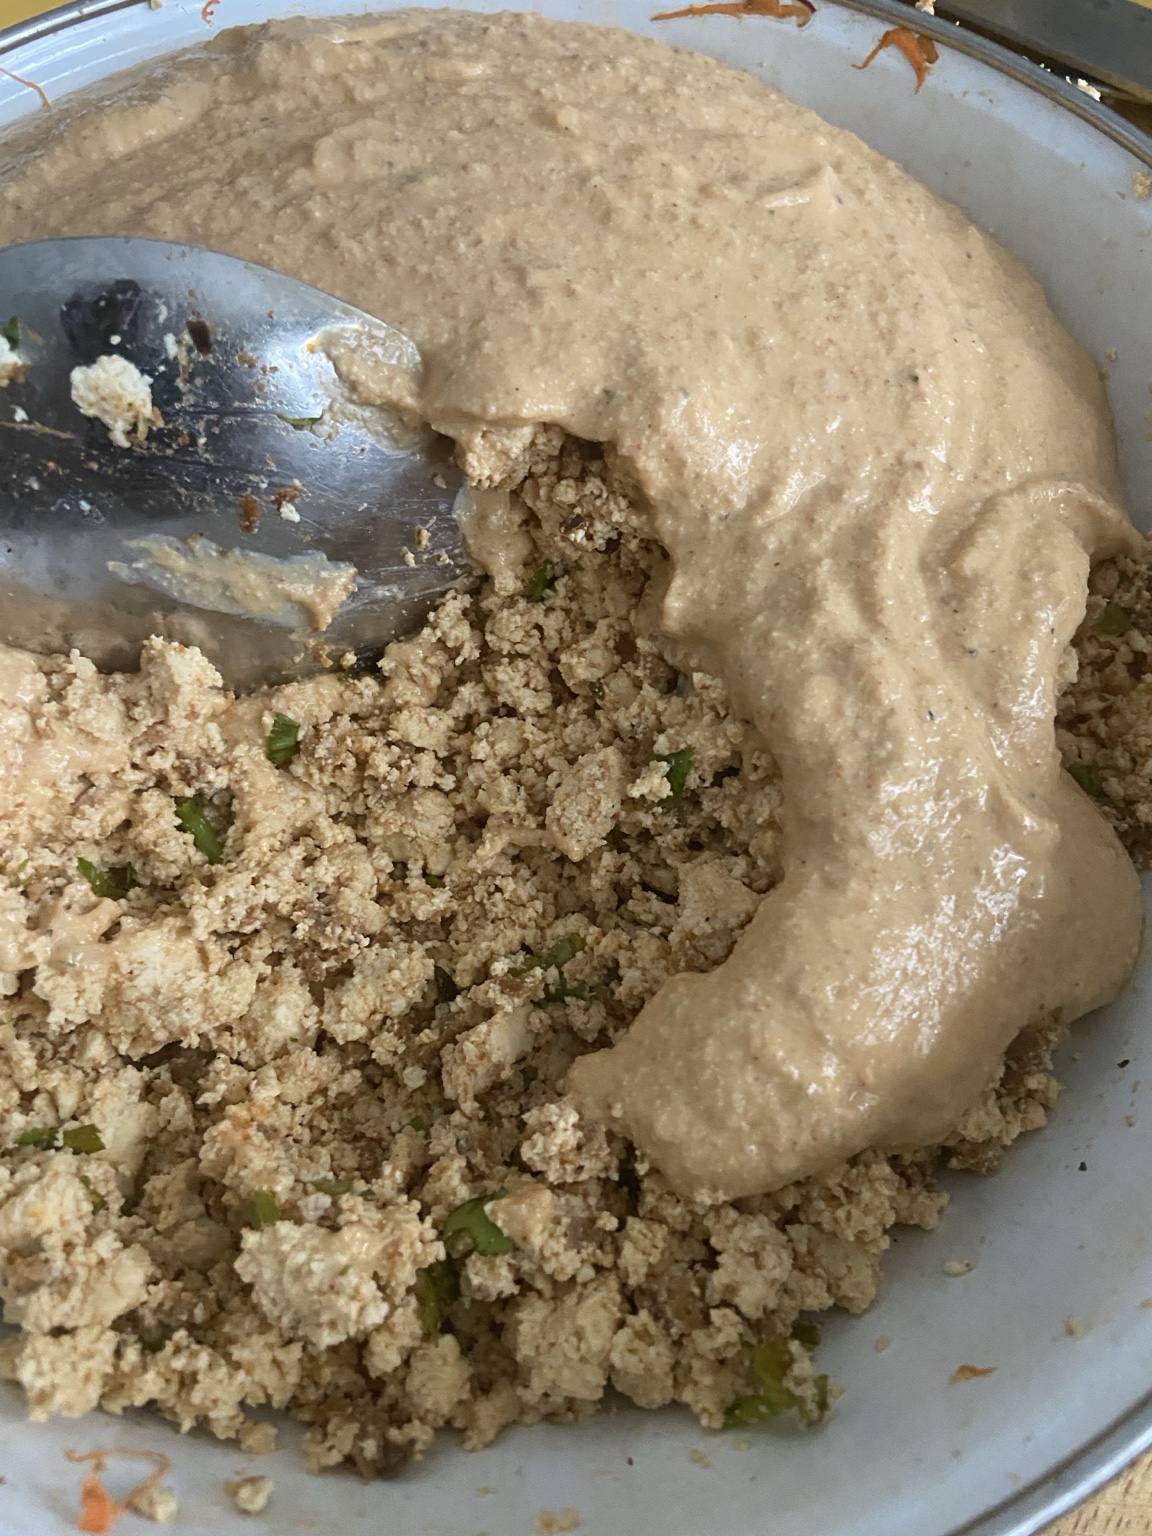
Pour your seasoned blended tofu into the bowl with the crumbled tofu.
If you’re using a second plant-based sausage, chop or crumble it and add it to the bowl.
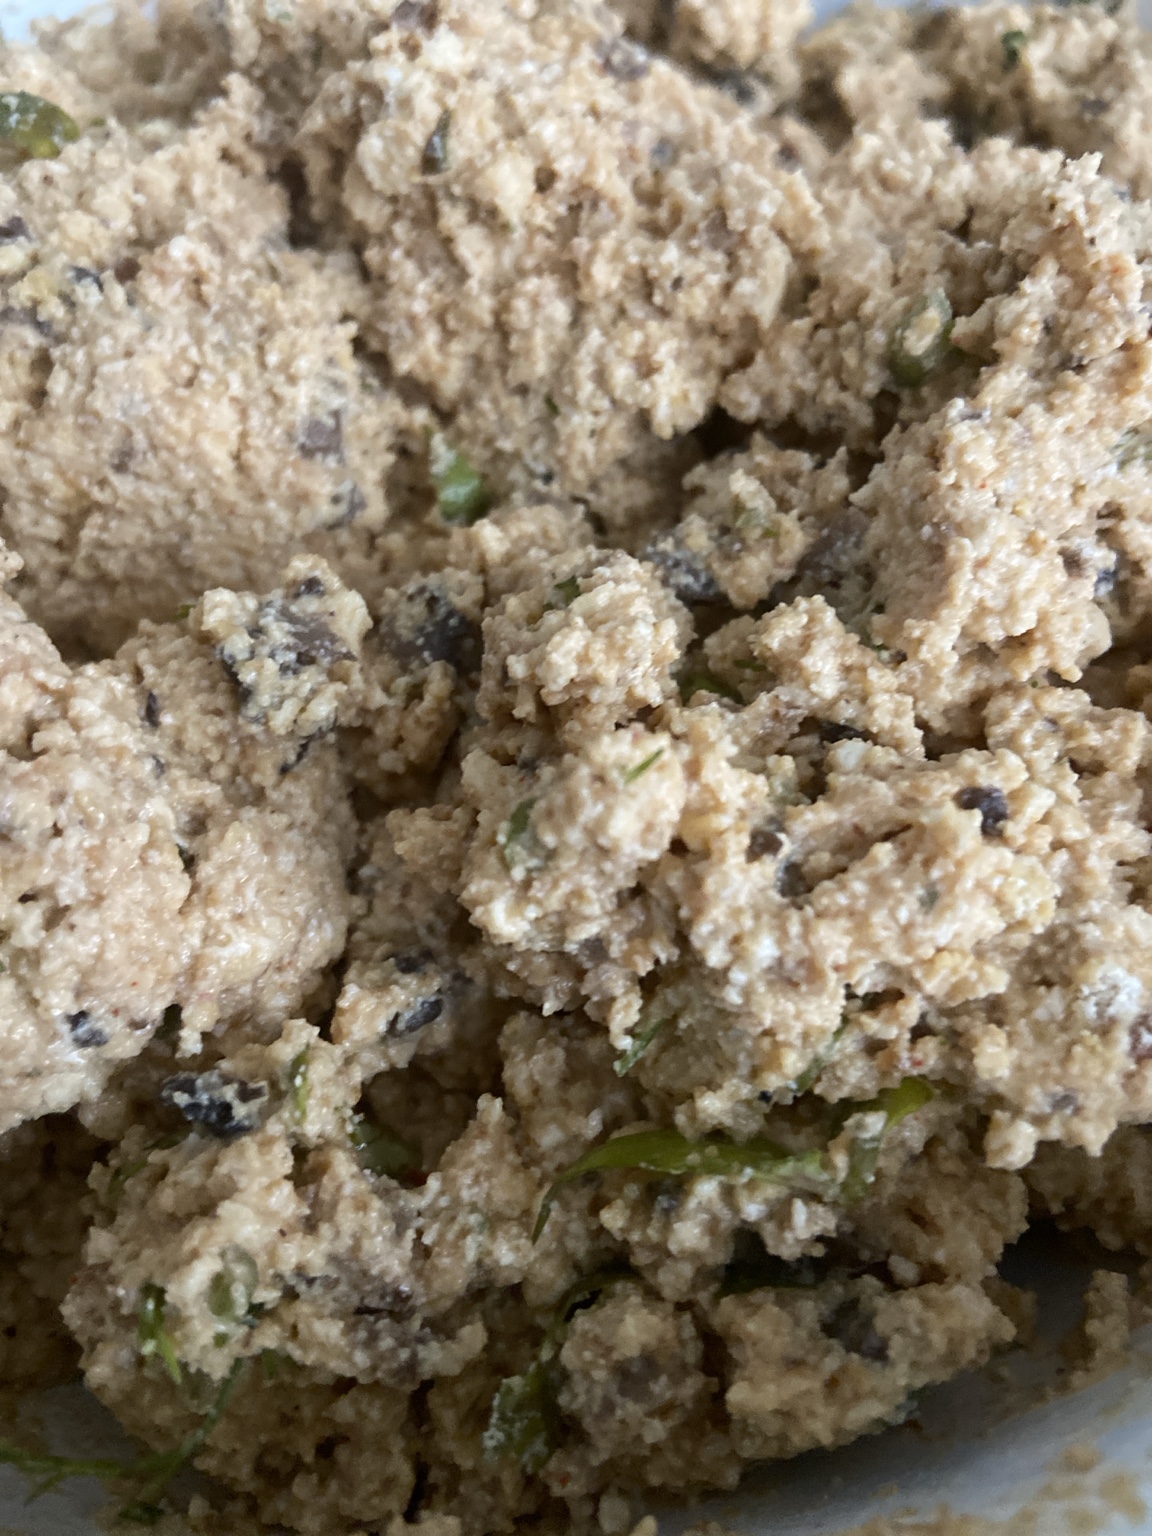
Mix everything together.
Step 4: Add a Little Freshness
This is one of my favorite parts.
I like a little freshness inside my mixture, so I’ll add finely chopped green onions, green garlic, or fresh herbs directly to the bowl.
You don’t have to cook green onions or green garlic first.
Treat them like fresh herbs.
Cilantro, parsley, and dill are wonderful options, too.
If you want to add mushrooms, regular onions, carrots, or other vegetables, chop them small and sauté them first as needed.
For mushrooms especially, cook off the excess moisture so they don’t make your mixture too wet.
Let any hot cooked vegetables cool a little before adding them.
Remember, these additions are optional. Use what you have.
Step 5: Add the Chickpea Flour
Now we’re getting into the part where you have to pay attention to the mixture.
I started with 1 cup of chickpea flour.
Then I mixed everything together and added more flour in roughly ¼-cup increments until the mixture was no longer overly wet, started pulling away from the sides of the bowl, and could hold its shape.
I can’t give you an exact final flour measurement because I didn’t measure every last addition.
I went by the texture.
You know…
Until the ancestors said, “That looks good!” 😂
The amount you need will depend on how much moisture is in your tofu and what vegetables you’ve added.
Start with the cup. Mix well. Add more as needed.
Don’t dump in a whole bunch of extra flour at once.
Step 6: Taste, Adjust, and Build Your Flavor
Here’s something I’ve learned from making this mixture.
Chickpea flour can dull your seasonings a little.
So even if the blended portion tasted just right, the final mixture may need a little extra smoked paprika, pepper, bouillon seasoning, or whatever your taste buds are asking for.
I like building flavor in layers.
And that brings me to a little kitchen confession.
Grandma’s Rules & Seasoning by Instinct 😂
Listen, I come from that old-school school of cooking.
I had a grandma who would taste her meatball mixture while it was still raw!
And yes, I’ve been known to taste my ShapeShifter mixture straight from the bowl, too. 😂
Now, I can’t tell you what to do in your kitchen. I’m just sharing how things go down in mine!
Tofu isn’t raw chicken or beef, but raw chickpea flour isn’t considered ready to eat. If you have concerns about tasting the mixture before it’s cooked, simply cook a little teaspoon-sized portion to check the finished flavor.
That’s a good way to see whether your seasoning needs another little boost before you cook the whole batch.
The bigger lesson?
Pay attention to your food.
Season in layers.
Taste when it’s appropriate and safe.
And don’t be afraid to adjust things as you go.
That’s how you develop your own kitchen instincts.
Step 7: Give It a New Personality
Here’s where the ShapeShifter really earns its name.
You don’t have to season the whole batch the same way.
Take a portion of your prepared mixture and put it in another bowl.
Want something spicy?
Try adding chili powder, chili flakes, finely chopped jalapeño, or finely chopped serrano pepper.
You can make one portion spicy and leave another mild.
You can make a fresh herb version, a smoky version, or a version with extra sautéed vegetables.
One base. Different flavors. Different shapes.
That’s the beauty of it.
Cooking the ShapeShifter: My Cast-Iron Skillet Method
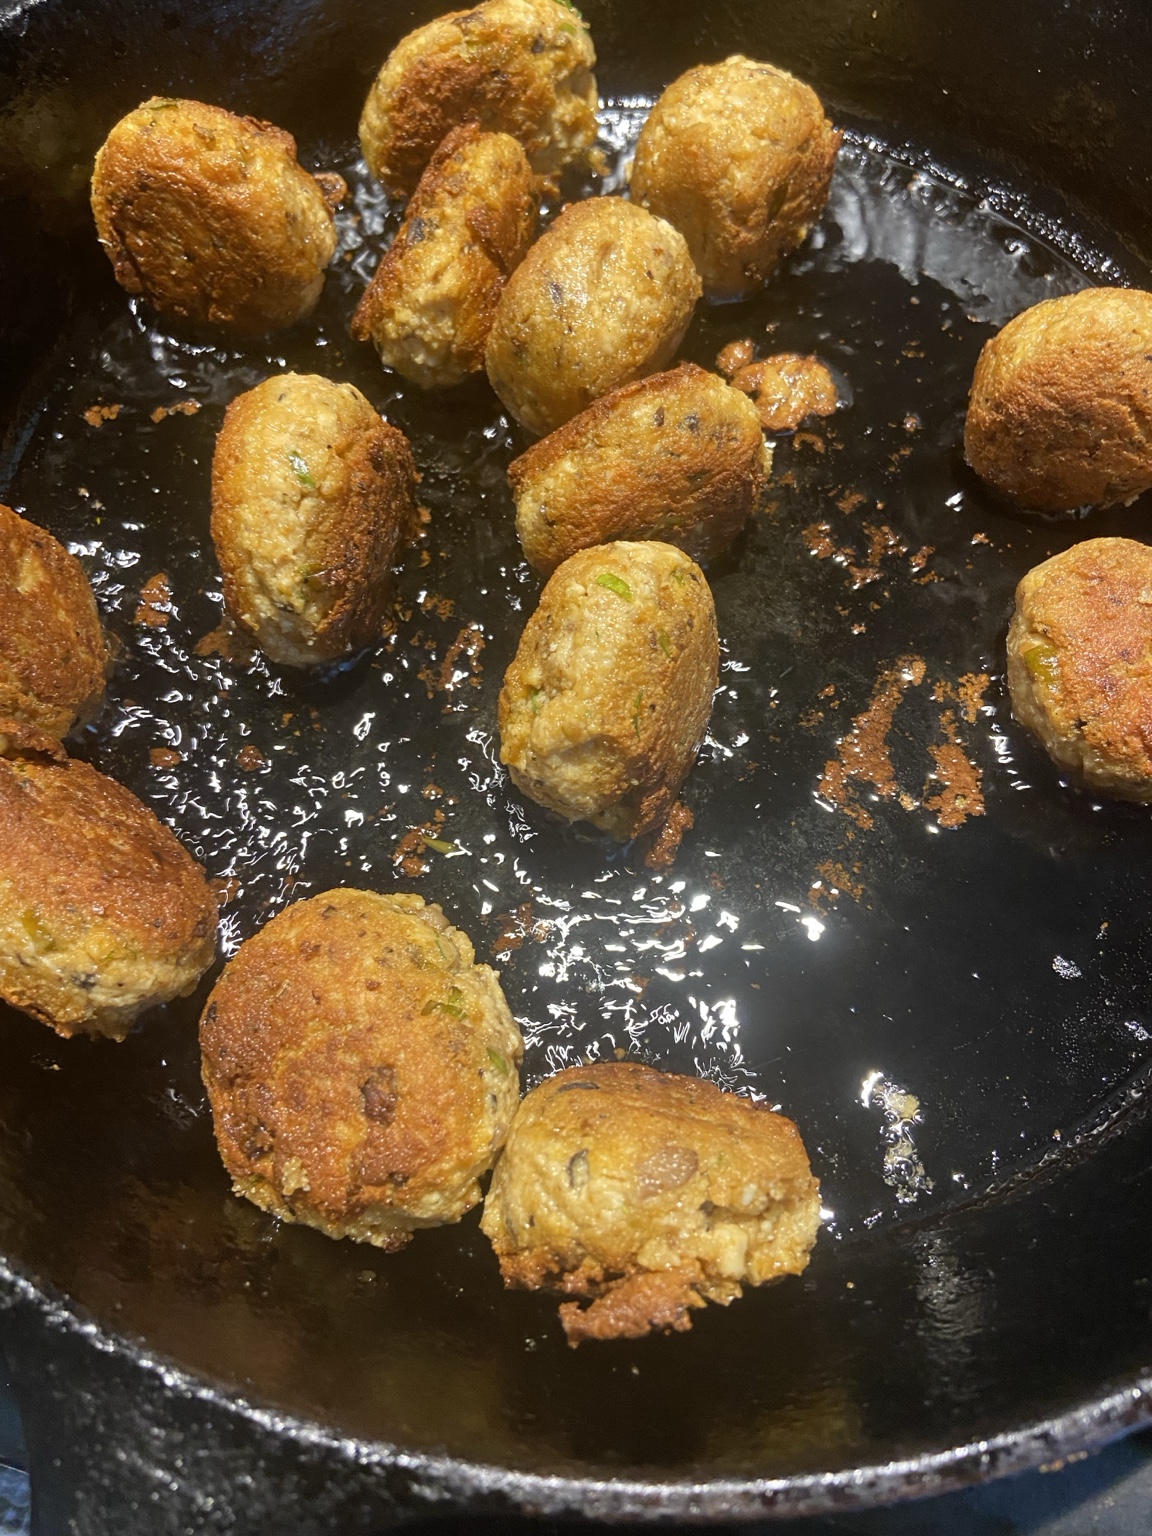
For this batch, I used my cast-iron skillet.
But you don’t have to use cast iron. Use a suitable skillet you already have.
I add a little oil to the bottom—enough to pan-fry the shapes without deep-frying them.
Then I cook over medium to medium-low heat.
I prefer keeping the heat moderate because you want the pieces to cook through without the outside getting too brown too quickly.
Especially if you’re still shaping the next batch while the first one is cooking!
Place your patties, logs, or bites in the skillet, leaving some room between them.
Let the bottoms turn golden brown, then flip or turn the pieces to brown the other sides.
Keep cooking until all sides are golden brown or crispy-looking and the centers are cooked through.
The exact time depends on the size and thickness of your shapes.
And listen…
Some of mine got a little darker than others. 😂
Sometimes I get busy shaping another batch.
Sometimes I walk away for a minute.
And sometimes that skillet reminds me I had something cooking!
A darker crust isn’t necessarily a disaster, but if your pieces are browning faster than they’re cooking inside, lower the heat.
A Little Advice From This One-Woman Kitchen
Here’s something that can make the process easier.
Shape all your pieces before you start cooking.
That way, you can focus on the skillet instead of going back and forth between sticky hands, the mixing bowl, and your cooking utensils.
You’ll have more control over the browning, too.
Or recruit your partner or a kid to help shape the mixture while you handle the hot skillet. Give younger helpers age-appropriate jobs away from the heat.
Me?
Sometimes I’m a one-woman show, so I do things on the fly! 😂
That’s real kitchen life.
Your food doesn’t have to look perfectly identical to taste wonderful.
Five Ways to Use the GreenHouze ShapeShifter
1. Golden-Brown Patties
Shape the mixture into rounds and pan-fry until browned on both sides and cooked through.
Serve with greens, rice, vegetables, or your favorite sauce.
2. Kebab-Style Logs
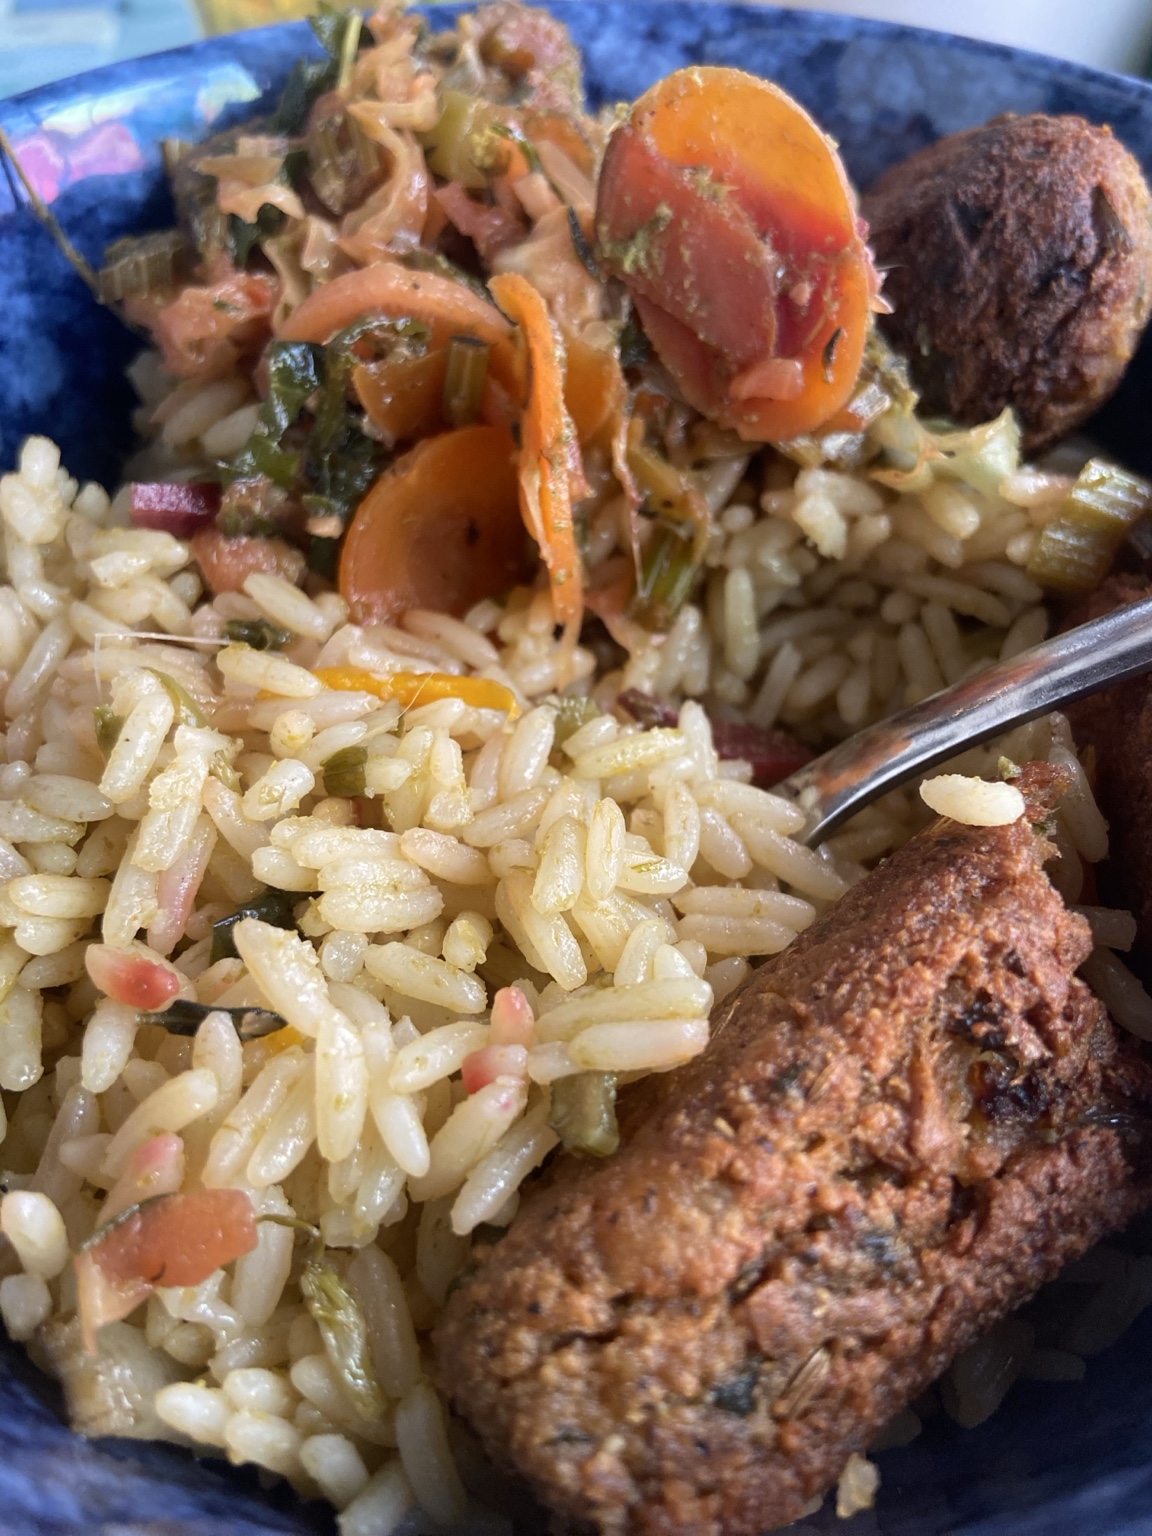
Roll the mixture into short logs or seekh-kebab-inspired shapes.
Pan-fry, turning gently until the sides develop a flavorful crust and the centers are cooked.
These are wonderful with rice, salads, or a bright herb sauce.
3. Crispy Little Bites
Make smaller pieces and cook until golden and crispy on the outside.
Use them as snacks, appetizers, or protein-rich additions to bowls.
4. Savory Crumbles
Skip the shaping altogether.
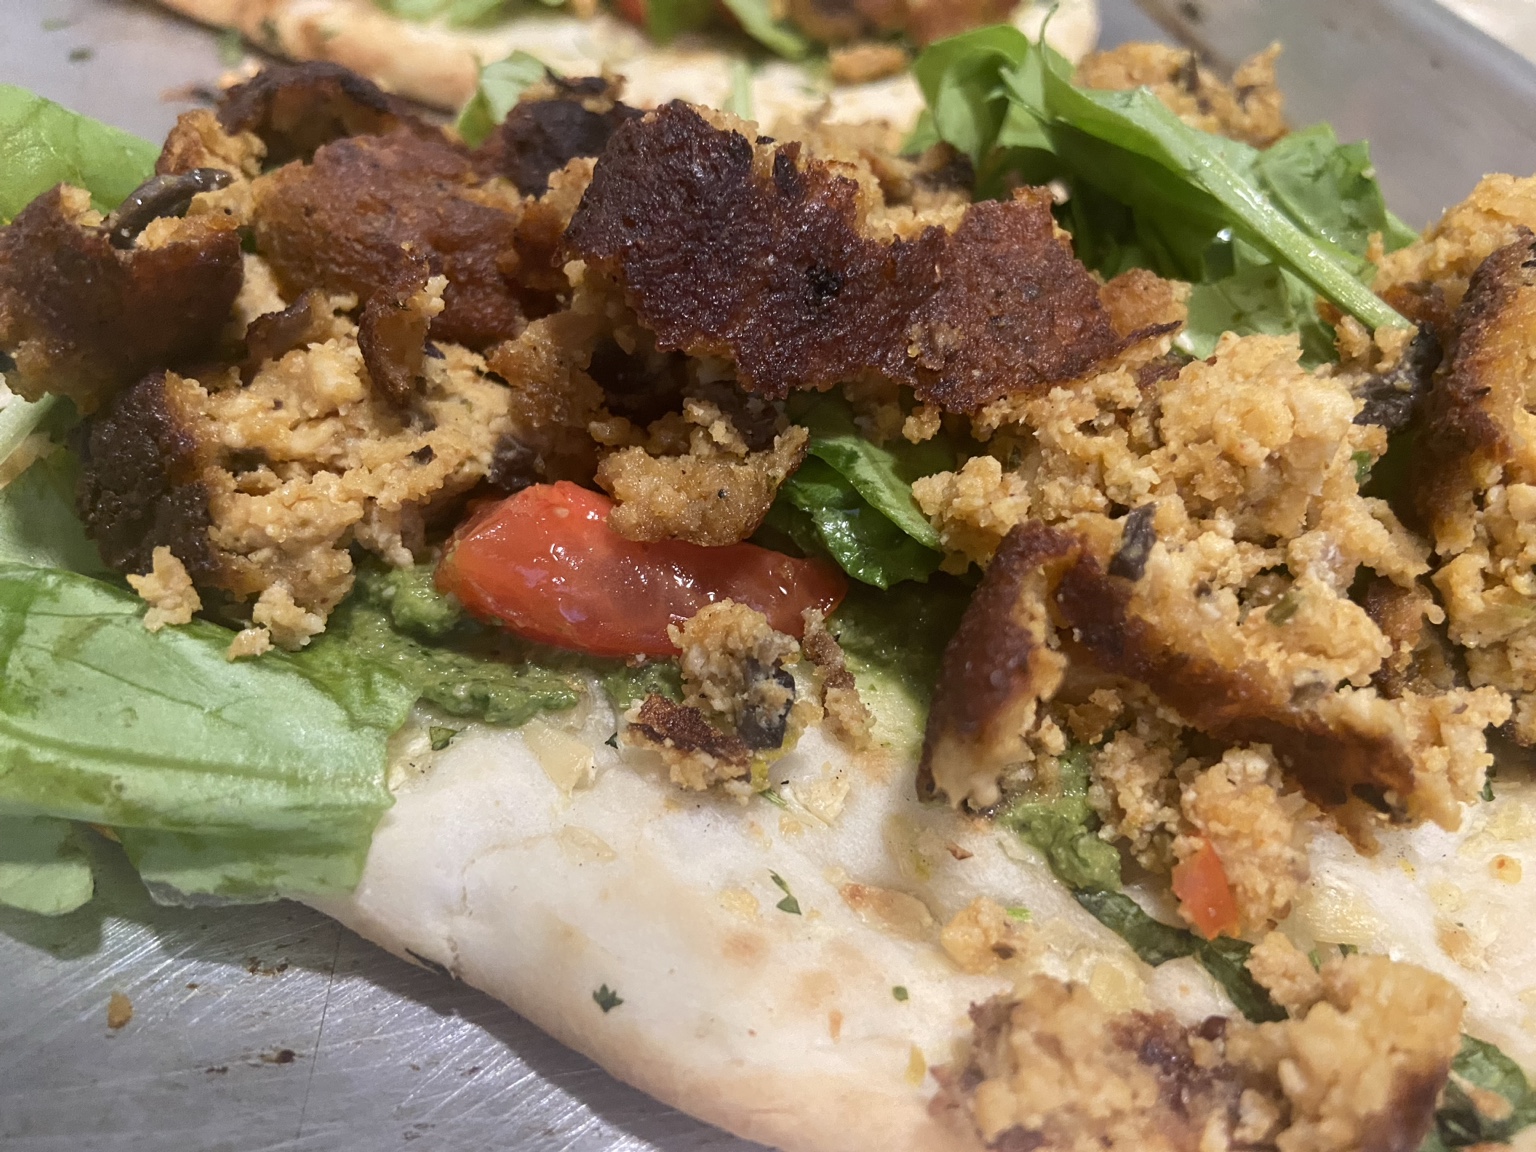
Break the mixture into smaller pieces in your skillet and cook until browned and cooked through.
Use the crumbles in rice bowls, wraps, stuffed vegetables, or other meals.
5. Flatbread and Wrap Fillings
Tuck cooked ShapeShifter pieces or crumbles into flatbread or wraps with fresh vegetables, greens, and a sauce you enjoy.
One mixture can turn into a completely different meal the next day.
Optional Add-Ins and Adaptations
The foundation is flexible, so don’t feel like you need every ingredient pictured in my kitchen.
Fresh and Fragrant
Try green onions, green garlic, chives, cilantro, parsley, or dill.
I especially enjoy fresh green onions and green garlic because they bring little bursts of flavor inside the finished mixture.
Cooked and Savory
Try sautéed mushrooms, finely chopped onions, carrots, or other vegetables.
Cook off excess moisture first and keep the pieces small.
Spicy ShapeShifter
Separate a portion of the base and add chili powder, jalapeño, serrano, or your favorite spicy seasoning.
That way, everyone doesn’t have to eat the same heat level.
Low-FODMAP Adaptation
If you’re managing IBS, consider using green scallion tops, green leek tops, or chives instead of regular onion.
The green portions are generally better tolerated in appropriate servings than the white bulb portions.
Regular onion powder and garlic powder may need to be omitted or replaced with suitable low-FODMAP alternatives.
Check fermented pastes, bouillon, and premade sausages for additional ingredients that may trigger symptoms.
Garlic scapes can be considered in appropriately measured portions, but green garlic and garlic scapes aren’t automatically interchangeable.
These are adaptation ideas, not a guarantee that the entire recipe is low-FODMAP.
Gluten-Free Adaptation
The tofu and pure chickpea flour foundation is naturally gluten-free.
However, some plant-based sausages, gochujang, doenjang, miso, and bouillon products can contain gluten.
Read labels and choose gluten-free alternatives or omit those additions as needed.
Storage and Meal Prep
Store cooked ShapeShifter patties, logs, bites, or crumbles in airtight containers in the refrigerator for approximately 3–4 days.
For longer storage, freeze cooked portions for about 2–3 months for best quality.
Reheat thoroughly until hot throughout.
A skillet is especially nice for bringing those crispy edges back to life.
This recipe works well for meal prep because you can make several shapes or flavor variations from the same batch.
When I Like to Make It
This is the kind of recipe I appreciate when I want a nourishing foundation that doesn’t lock me into eating the same meal every day.
Patties today.
A rice bowl tomorrow.
Crispy bites or flatbread another day.
And maybe a spicy variation somewhere in between.
Keep it simple. Use what you have. Make it work for your kitchen.
The GreenHouze Upgrade
Want to make this mixture work even harder for you?
Divide the finished base into two or three portions before cooking.
Make one portion savory and mild.
Make another spicy.
Give the third a fresh herb-forward flavor.
Then turn each portion into whatever shape suits the meal.
That’s how one recipe becomes a whole collection of possibilities.
Final Thoughts: Let Your Food Evolve
The GreenHouze ShapeShifter isn’t about making every piece look perfect.
It’s about understanding your ingredients, building flavor, learning texture, and giving yourself permission to create.
Start with the foundation.
Add what you have.
Season it how you like.
Shape it into something that makes you excited to eat.
And when the texture feels right?
Well, sometimes you just have to trust the ancestors. 😂
Plant • Heal • Evolve.
GreenHouzeEatz — where nourishment meets creativity.